My next venture in hammocking is complete! I’ve used an underquilt kit (and excellent advice!) from Gerrit at HOGS, Hofman Outdoor Gear Supply, hofmanoutdoorgearsupply.ca, in Brandon, Manitoba. I’m warm and comfortable below -5°C now — which is about as cold as I anticipate for my hiking.

Background
An underquilt, ‘UQ’, goes underneath and outside a backpacker’s hammock to reduce heat loss — ‘cold butt syndrome’! It’s paired with a topquilt inside. A topquilt is essentially a zipperless sleeping bag that keeps my top and sides warm but does not fit under me (which would compress it, ruining any insulation value). The UQ hangs below the hammock but is lightly pressed up against me. Because it’s not compressed by my weight, it retains its insulation value.
Backpacking quilts are usually stuffed with down, which while warmer and more compressible than synthetics, is much more susceptible to wetness since down is useless when wet. Modern synthetic insulation is slightly bulkier and heavier than down, but is significantly more tolerant of day-after-day dampness and wetness. I used one of the best current synthetic insulations, Climashield Apex. I chose to go with a 3.6 oz batting rather than thicker and warmer but more bulky 5 oz insulation. (But check the final adjustment I made …)
Until now I’ve used a down sleeping bag combined with a inflatable sleeping pad (both inside my hammock) and have been able to sleep comfortably down to about 0°C — and uncomfortably a few degrees below that. The narrow pad is a hassle to stay on top of at night in the hammock, as I have to readjust it with every toss and turn. The combination of quilts, topquilt & UQ, covers almost the whole sleeping area of the hammock, and so is more comfortable, as well as being more adjustable.
I’m not a user of ‘thread-injectors’ (sewing machines, in hiker parlance). Over forty years ago, I did make a two-layer 65/35 polyester-cotton outer jacket from a complicated kit with a great deal of instruction and trouble-shooting from my wife. But since, nada … However, I do like to tinker and modify things I use, so an UQ seemed like somewhere to start.
Initially, I ordered a down-filled UQ kit from Hogg’s. But procrastination took over, including the fear of having to sew so many baffles to contain and control the down. So I ordered the supplies for using synthetic 3.6 oz Climashield batting rated to just above 0°C instead. And then I waited until my sewing daughter had an evening to come over and help get me started.
Tutor and Guardian
This is the same daughter who is a ‘sewcialist’ who sews all her clothes. She also designed and made for me the wonderful windproof and waterproof fleece jacket that I wore for my Bruce Trail thruhike and has since been my winter jacket for the last two years. She was a wonderful tutor and troubleshooter for the seven hours that it took me to start and nearly finish the UQ. I did all the sewing. She did the troubleshooting, the guidance, and the encouragement. Wonderful!
The materials that came in the kit from HOGS were top quality. The instructions Gerrit sent me were also excellent, very clear and in sequence.
Process
It took me about an hour and a half to gather the gumption to actually cut the material to the desired sizes and shapes. I am 192 cm tall and about 95 kg in weight so I am a good-sized lad. I decided that I would make my UQ extra long so as to be fully covered underneath. I cut the fabric to 208 cm, and the UQ ended up being a few cm shorter because of seams. A good length for me!
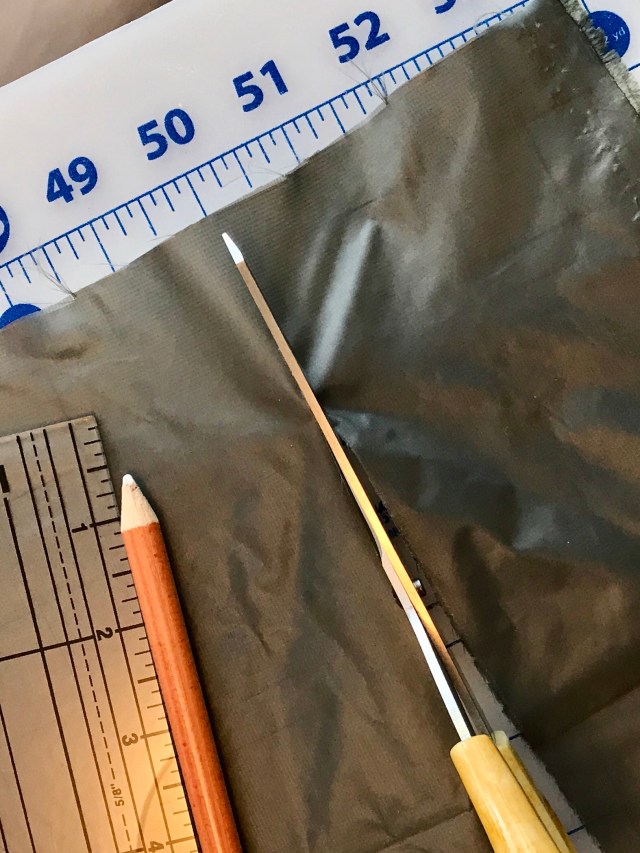
Measure twice, cut once. Or in my timidity, measure twice, check measurements, measure again, cut once.
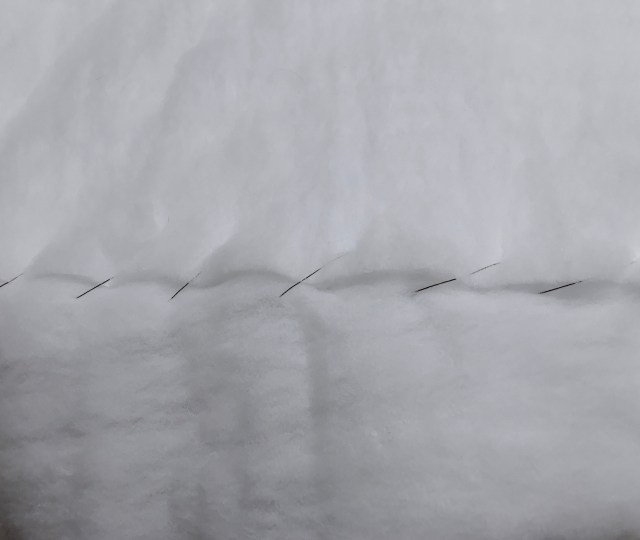
Then came the crucial step of setting the tension on the thread injector. That, and determining how the machine would deal with thin slippery synthetic fabrics … We put on a travelling foot and it worked very well, even later on stitching through layers of fabric plus insulation batting. As for tension, this was my daughter’s decision. Phew! My wife normally sets the machine for ‘3’. We tested various settings and ended up with a tension setting of ‘7’, based on how the thread was evenly pulled though from both sides. (Check the top line of stitching.) I got laughed at for using my botanist’s magnifier — but I now understand the tension decision!

So … very tentatively at first, then with slowly increasing confidence, I started stitching.
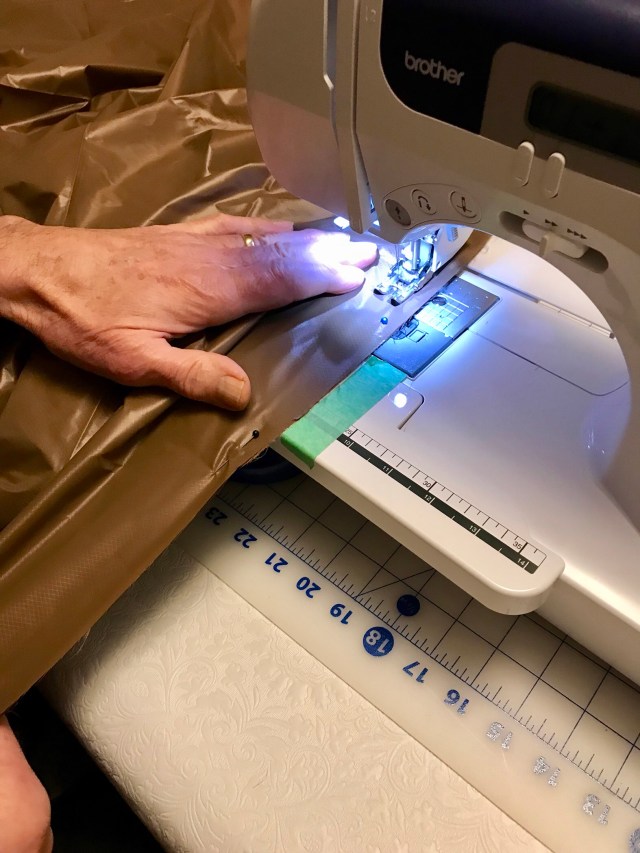
Gentle observations and corrections came from the adjacent room: “Oh, did you trap the loose threads before starting?” … oops! … “Broke a needle, eh?” … yikes! … “Nice steady sewing!” … phew! …

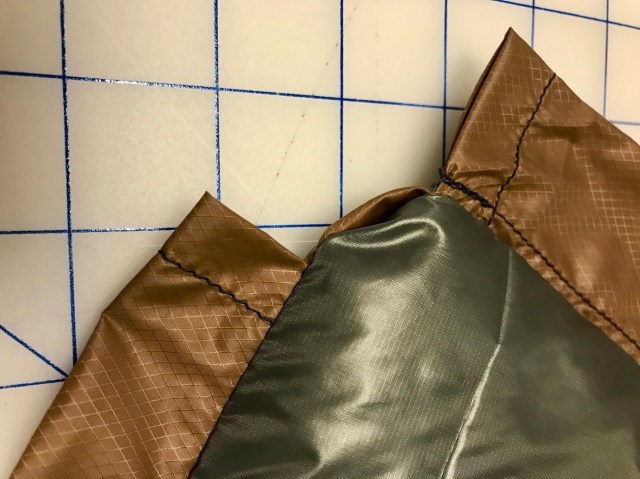
The darker material, 1.0 oz HyperD calendered diamond ripstop nylon, is the outside and bottom of the UQ, which should be the tougher of the two fabrics. It’s remarkable stuff, with a fine diamond-shaped ripstop threading that gives it unusual toughness for its 1.0 oz weight. The inner / upper / next to the hammock grey material is a different calendered 1.1 oz nylon, a less-tough material, but still remarkably lightweight. The main reason for choosing the lighter-coloured material for the inside is to help avoid the disaster of climbing into the hammock in the middle of the night after ‘checking the stars’ and inadvertently missing the edge of the hammock and landing on the edge of the underquilt instead. Both fabrics are calendered (pressed between rollers to smooth the surfaces) because I intended them to be resistant to being punctured by the down I was initially going to use as insulation.
Some details
Though I’m not going to go seam-by-seam through the sequence of the sewing, some details are worth making. (Gerrit’s instructions were excellent!)
- A down UQ is tapered and sewed into a careful 3-dimensional shape, with longitudinal no-seeum baffles to contain the down. The inner fabric is smaller than the outer fabric so that the UQ is scooped and the down is protected from compression when in use. Synthetic UQs don’t need to be so fancy since the batting is sewn around the edge to the two pieces of fabric and is therefore already compressed along the edges. Much simpler! So both main pieces of fabric are the same size, and the quilt is rectangular end-to-end.
- I took offcuts from trimming the sides of the main pieces, then folded and sewed them to make channels along each of the four edges. These channels hold the shockcord used for the 3 elements of the suspension system.
- I first sewed the channels. Then I put the main pieces good-sides together and sewed the channels in as the edges of the main pieces are stitched.
- I left an opening of about 30 cm along the middle of one end. This became the cavity through which I later inverted the batting into the space between the two surfaces.
- I sewed the 3.6 oz Climashield batting onto the inner light grey fabric, stitching through the four layers of fabric: inner, 2 layers of channel, outer. I was pleased how well the traveling foot worked with the batting face-down.
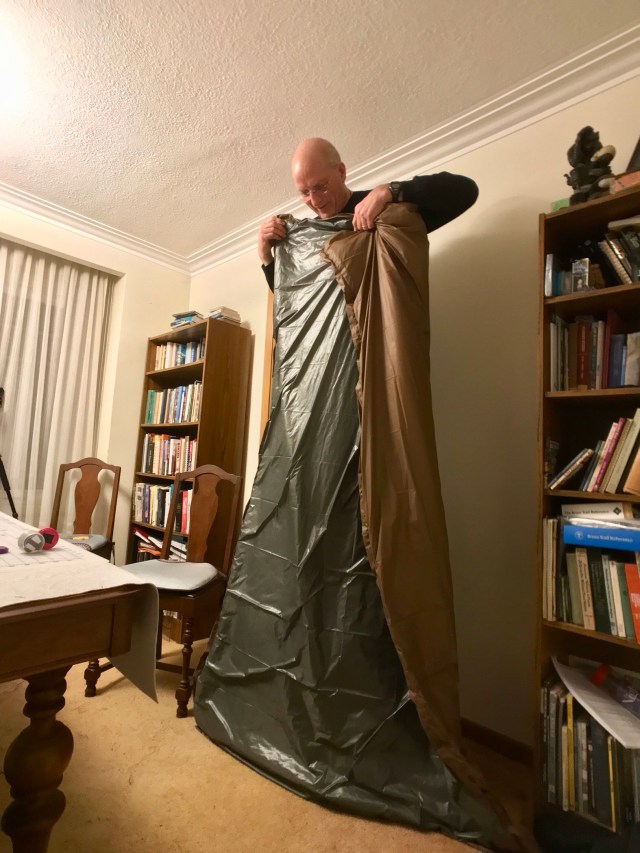
- Then I inverted the whole thing through the hole and sewed it shut.
- Then I ran the shockcord through the channels — and went out to the garage where I’d installed strong hooks into the studding, hung the hammock and then the UQ, and settled in!
- Ahh! … Cold Butt Syndrome … My backside was definitely warmer … but still too uninsulated … But I was not surprised.
(I might be standing on a chair … “You ain’t big — just tall, that’s all”)
There are three components to suspending the underquilt to the hammock. The primary shockcord is a continuous loop that runs through the long side channels and is clipped to the head and foot ends of the hammock, adjusted by one cordlock to keep the UQ snugly up against my backside. The secondary suspension is pair of shockcord loops each of which runs from one end of the UQ around the close end of the hammock and back to the same end on the other side. This pair of shockcords are adjusted to move the UQ back and forth end-to-end, and to stretch it out to full length. The third suspension is shockcords side-to-side through the channels on the head end and on the foot end. These shockcords pucker the ends of the UQ to close off air gaps that allow cold air down under my feet or head. In practice, once these three suspension systems are set, the UQ is just clipped onto the hammock without further adjustment. However, setting the appropriate tensions on three interconnected systems took some time — mostly with me lying in the hammock and my wife feeling up and down my back, tightening here and loosening there. The UQ is now in the goldilocks setting, not so tight as to compress the insulation, and not so loose as to allow air gaps.
Adjustments
I still had one more big change. I bought 3.6 oz Climashield insulation rated a few degrees above freezing. But I want to be able to sleep outside from April until October. When I thruhiked the 890 km Bruce Trail here in Ontario a couple of years ago, I found out that even in May our record minimal overnight temperature is -17.6°C! (I remember that particular disastrous temperature because it killed 80% of our apple blossoms throughout Ontario that season!) I don’t need to be able to stay warm in those frigid temps. I’d get off the trail, or just keep hiking, even slowly, through the night, using my headlamp. But I would like to be able to sleep, albeit not fully comfortably, down to -5°C or so. I can layer up clothing; eat fat- and carb-rich food before climbing in; do a few minutes of strenuous jumping-jacks before turning in; keep a water bottle filled with warm water between my thighs; and just plain tough it out. I could also just get up and start hiking when my body temperature drops in the few hours before dawn.
After adjusting the suspension many times, and being on the cool side of comfortable in my garage at about -3°C, I decided I needed more insulation. I had an offcut from the Climashield that was fortuitously about the same dimensions as me. I re-opened the stitching where I had done the final inversion of the quilt, everted the insulation, and using a simple looping stitch, hand-sewed the extra Climashield on top of the existing insulation. I put that final warmth slightly askew, matching the exact diagonal lay I use in the hammock. I get a flatter sleep by laying feet to the right side, butt in the midline, and head to the left side, a diagonal lay of a bit less than 30° from straight. Success! I now think I can be comfortable below freezing, and could probably survive well below that.
Thoughts
So — or should that be ‘Sew!’ … A total of about 8 hours of tentative sewing and learning and I have a fine UQ that’s a definite improvement over my previous constricted sleeping bag and inflatable pad. Total cost? Less than buying a custom UQ built for my size and wants.
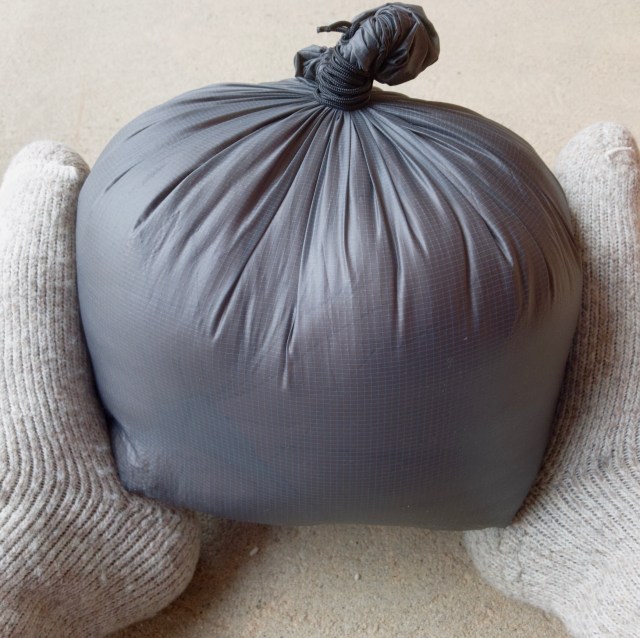
The full UQ and the fittings and suspension system weighs just under 890 gm. I’m pleased with that weight, especially given its relative warmth. I can forcefully compress it to a remarkably small size.
But I don’t actually compress either quilt that much. I line my backpack with a strong garbage bag (actually a trash compactor bag that we can’t buy here in Canada … Thanks, RangerZ for sending me one!). I then loosely wad the quilts down into the bottom of my pack, put my extra clothing on top, push down firmly, and roll the top of the plastic bag down, sealing it more tightly if I suspect rain during the day. The rest of my gear and food goes on top, compressing what’s below as needed. My pack tends to start the same volume most of the time, with the amount of compression depending on how many days of food or how much water I have to carry that particular day. (Each day of food is just under a kilogram. Each litre of water is 1 kg. I’ve had to carry up to 6 litres of water beginning some dry days. My consumables were therefore 12 kg one day at the beginning of one long dry 6-day section. That was not comfortable at all, and I was very happy drinking 6 kg of water that day and eating the day’s worth of a kilogram of food! As I get more experienced I am dropping my base weight (everything I carry minus consumables) down to about 6 kg — big lad, big clothes, big equipment …
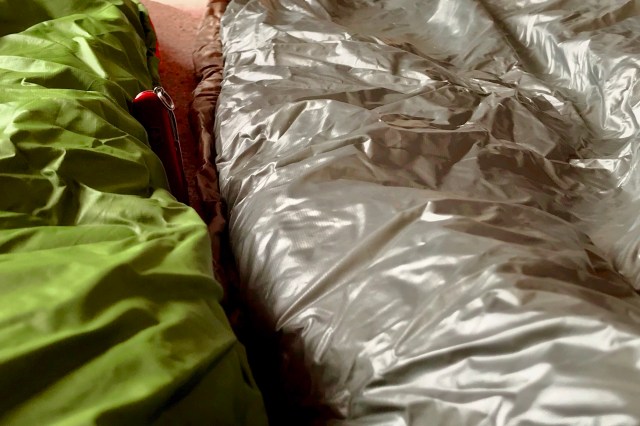
(Here’s a photo of the green topquilt with my small Swiss Army knife for scale, beside the UQ. You should be able to see that my UQ is about half the thickness and therefore half the warmth, with the top right portion of the photo showing the added second layer of insulation bringing the portion of the UQ directly under me to about the same warmth as the topquilt.)
And what’s next? …
There are some additional modifications I might make. If I were to put a short grosgrain loop about where my left shoulder is, and another down by my feet on the right side, I could attach them to existing tabs on the hammock, holding it in proper head-to-foot position. This would essentially replace the secondary suspension, reducing the overall weight by eliminating a fair amount of shockcord.
I might add a full double-ended zipper along the left side of the hammock itself so that I could switch to the normal side-entry method. If you look at the video below, you’ll see that presently I duck backwards into a velcro-closing slit in the bottom of the hammock. I like how that bottom entry approach all but eliminates mozzies coming in with me. However, entering through the bottom means that I have to push aside the UQ and then fidget to align it once I’m inside the hammock. I’ve got that fussing figured out, but it would be simpler to just get in via the side.
I could perhaps shape the remnants of the Climashield and the HyperD into a very warm sleeping hoodie-hat. Perhaps I could make my own topquilt, one that would be less warm and more suitable for summer use than the very good but expensive -5°C version I bought for my hiking partner (but ended up keeping for complicated reasons). Perhaps …
Backyard hammocking
Here’s a time lapse movie of me (in my fine red jacket sewn by my sewcialist daughter and mentor) setting up the underquilt on the hammock. The hammock is a Canadian-designed Hennessy Explorer Ultralight Classic with a larger fly, and some whoopie slings for suspension. You’ll see me getting in through the bottom of the hammock — a unique feature of the Hennessy hammocks, one that I might change as it causes some adjustment issues once I’m in the hammock. I fidget somewhat as I pull the UQ into position and wrap myself in the topquilt. It was just about 0°C with a decent breeze — and I was immediately warm inside and below me once I got into the hammock. Sweet!
The proof is in the pudding: the night after this video, I slept out in the hammock with the UQ and the green-and-red topquilt. It was just below 0°C with a moderate breeze. I wore what I will take hiking at the end of September up in Killarney Park. I snugged the tarp down onto the hammock. I was toasty warm all night! Yeah!

One thought on “DIY underquilt from HOGS”